|
European 1 into 9 King's Mail With a Twist
|
|
Basic Pattern
|
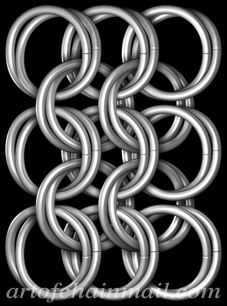
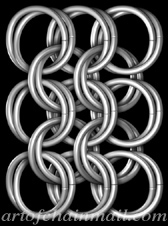 European 1 into 9 King's Mail With a Twist is an advancement of plain King's Mail that I developed. European 1 into 9 King's Mail With a Twist is an advancement of plain King's Mail that I developed.
The only difference is that every doubled link passes through its double, instead of sitting beside it.
This means that every link actually passes through 9 other links.
As far as I'm aware there is no historical basis for this pattern.
|
|
|
|
Including preparing doubled links, the ratio of links for this pattern is 1 Closed Link to 3 Opened Links.
|
|
|
|
Preparation Before Starting
|
|
|
Preparation Step 1
|
- Place an open link through a closed link.
- Close the open link.
|


|
|
|
|
Preparation Step 2
|
- This makes a double link
- You will need 9 double links in total for the following sample and many more if you plan to make a large piece of this pattern.
|


|
|
|
|
|
|
Step 1
|
- Place an open link through four double links.
- Close the open link.
|


|
|
|
|
Step 2
Layout
|
- Lay the first nine links out as in the illustration.
|

|
|
|
|
|
Step 3
Twist Doubling the Initial Link
|
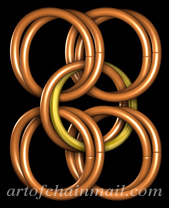
- Place an open link through the 9 closed links coloured copper in the illustration.
- This link passes through the initial open link.
- Close the open link.
|
 |
|
|
|
|
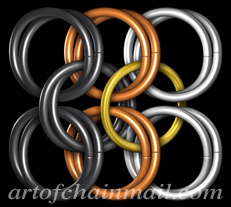
Step 4
Adding to the Column Edge
|
- Place an open link through 2 double links.
- Place the open link through the 2 column edge double links coloured copper in the illustration.
- Close the open link.
|
 |
|
|
|
|
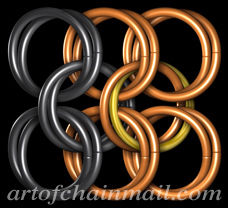
Step 5
Twist Doubling the previous link
|
- Place an open link through the 9 closed links coloured copper in the illustration.
- This link passes through the previous open link from Step 4.
- Close the open link.
- Repeat Steps 4 and 5 to make the pattern wider
|
 |
|
|
|
|
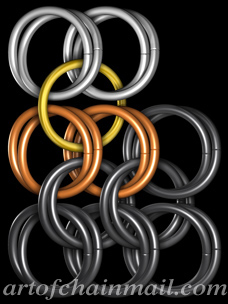
Step 6
Adding to the Row Edge Start
|
- Place an open link through 2 double links.
- Place the open link through the 2 row edge double links coloured copper in the illustration.
- Close the open link.
|
 |
|
|
|
|
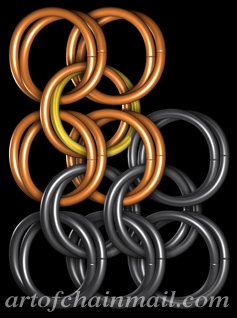
Step 7
Twist Doubling the previous link
|
- Place an open link through the 9 closed links coloured copper in the illustration.
- This link passes through the previous open link from Step 6.
- Close the open link.
- Repeat Steps 6 and 7 each time you start adding a row.
|
 |
|
|
|
|
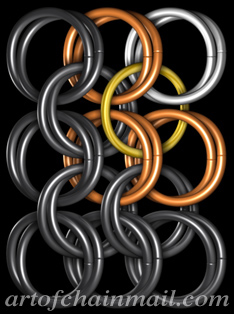
Step 8
Adding to the Row Edge
|
- Place an open link through a double link.
- Place the open link through the 3 double links coloured copper in the illustration.
- Close the open link.
|
 |
|
|
|
|
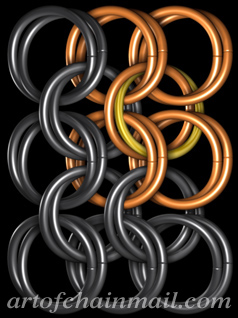
Step 9
Twist Doubling the previous link
|
- Place an open link through the 9 closed links coloured copper in the illustration.
- This link passes through the previous open link from Step 8.
- Close the open link.
- Repeat Steps 8 and 9 to continue a new row, making the pattern longer.
|
 |
|
|
|
|
Finished European 1 into 9 King's Mail with a Twist
|
|
|
|
 European 1 into 9 King's Mail With a Twist is an advancement of plain King's Mail that I developed.


