|
Hana-Gusari Mail (2/6 Hex)
|
|
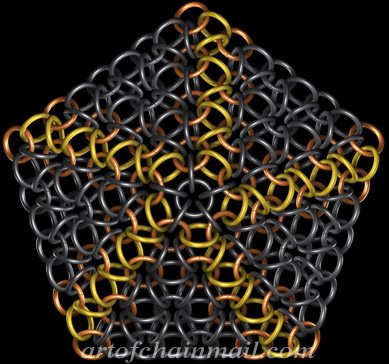
Pentagon Attachment
|
 This is a special way of attaching Japanese Hana-Gusari Mail that I use when I want the pattern to wrap smoothly around a 3D shape. I find it particulary useful for the cups of my Hana-Gusari brassieres.
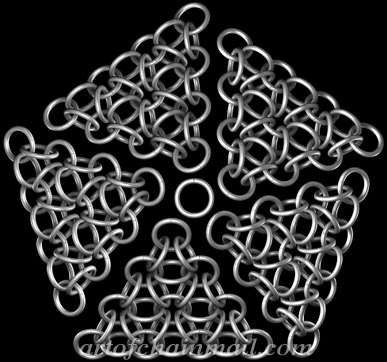
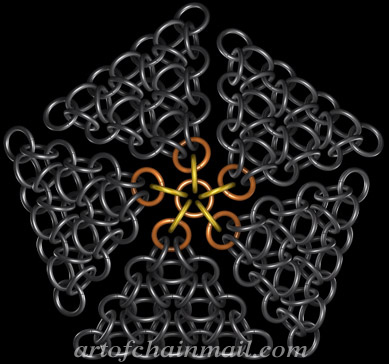
I have never seen a historical pattern that uses this type of attachment, it should only be used for fantasy and fashion garb. This type of pattern attachment, which also works for the angled column edges in European 1 in 4 Mail, capitalizes on base polygons to create semi-polyhedronal shapes (shapes that will flex into 3 dimensions). This is especially useful for patterns like Hana-Gusari that have no natural expansion or contraction. This method can also be used to create any polygon smaller than a hexagon, such as a pyramid using 4 triangles or a tetrahedron using 3 triangles. This will probably be the only complex illustration I create of a Hana-Gusari attachment (The 3D renders just about killed my PC), but don't let this limit your imagination. The combinations of base Hana-Gusari shapes is endless, they can even be combined with squares and rectangles of Hitoye-Gusari to create even more polygons. The following pattern is for a small pentagon, please feel free to use larger or smaller base triangles to vary the size of the final piece. |
|
This attachment requires only opened links.
|
|
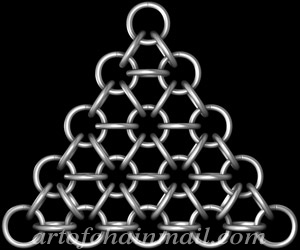
Starting a Hana-Gusari Mail Pentagon
|
|
Step 1
|
|
|
|
|
Step 2
Starting a Row
|
|
|
|
|
Step 3
1st attachment for a new row
|
|
 X 5 |
|
|
Step 4
Continuing to attach a new row
|
|
X 35 |
|
|
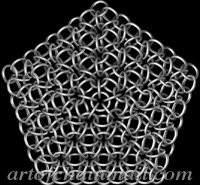
Finished Japanese Hana-Gusari Pentagon
|

|
